
Click the tag to see it full size.
This Tutorial was written by me, Angel Flower, from my own ideas. Any similarities to others is coincedence. All my tutorialsare registered with TWI.
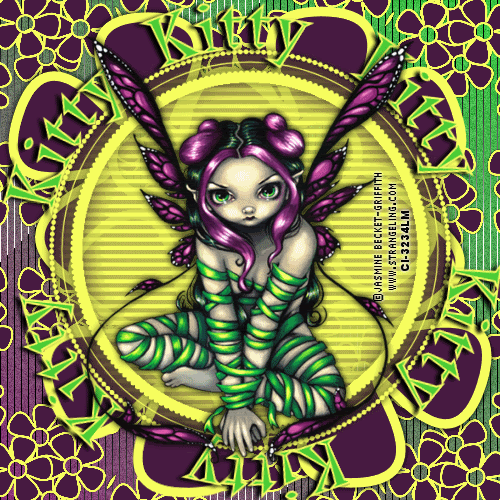
For this tutorial you will need A tube of choice. I am using the work of Amy Brown. In order to use the image in this tutorial you MUST purchase it from CILM.
A circular type mask- I am using a mask called sg_stencilled-circle1 by Essex Girl, you can find her masks here http://www.essexgirl.uk.com/sg_masks_index.htm. I do not know which page this mask is on, sorry.
Filters-DSB Flux linear transmission
New image-600x600-transparent.
Paste your tube as a new layer. If needed resize it by clicking the little arrow tool and then drag the box around the tube by the corner to the size you want. Or if you would rather, go to image-resize-lock aspect ratiochecked, all layers unchecked, choose percentage, about 85 percent. If it makes it too small or is still too big, undo and try again with a different percentage. Center the tube in the canvas.
Duplicate your tube layer. On the bottom tube layer, go to effects-distortion effects-twirl 720. Still on this layer, go to adjust-add noise-guassian, monochrome-40.
Duplicate your tube layer again. Again, on the bottom tube layer, go to effects-plugins-dsb flux-linear transmission- size 4, offset 11, blend 0, horizontal. Move this layer below your twirled layer. Go to effects-3d effects-drop shadow 0, 0, 100, 5 white.
Click your bottom blank layer to make it active. Grab your paint bucket tool and Choose a light to medium color from your tube for a fill color. Flood fill this layer with the color you chose. Go to layers-load/save mask-load mask from disk- in the drop box find the mask you are using and click it, source luminance, fit to canvas, hide all, and invert checked. Load. Right click on the mask layer and merge group. Now go to effects-edge effects-enhance.
Hide all your layers except the masked layer by clicking the eyes next to them. grab your magic wand-mode is add, match mode rgb, tolerance 10, feather 0, anti alias checked. Click in the center of the masked layer. The center circle part of the mask should have the dancing ants around it. If it doesnt, you may have to use the selection tool instead and set it to ellipse and select it that way. Once selected, go to adjust-add noise-random-monochrome15. Select none.
Unhide your other layers.
Make your tube layer active. Go to effects-3d effects- drop shadow, 0, 0, 80, 10, black.
Now is the time if you wish to resize your entire tag to do so. I did not resize mine. If you wish to do so, go to image resize- all layers checked, lock aspect ratio checked, pixels instead of percent, and choose the size you want.
Now add your copyright so it is clearly legible. I added a gradient glow to mine with a size of 3.
You can use a drop shadow in a light color also if needed.
Add your name. Right click and convert to raster. Go to effects- edge effects-enhande. Now go to adjust- add noise-guassian-monochrome-20. Repeat the noise this time with add noise-random-monochrome-15.
Give your name a drop shadow of choice.
Save and you are done!
©ANGEL FLOWER DECEMBER 2009


