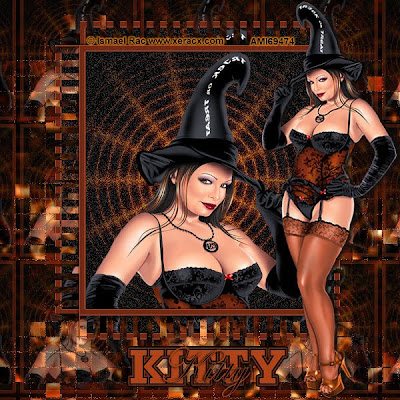
click the tag to see it full size
This Tutorial was written by me, Angel Flower, from my own ideas. Any similarities to others is coincedence. All my tutorial sare registered with TWI.
For this tutorial you will need A tube of choice, one with a close up works best. I am using the work of Ismael Rac. In order to use the image in this tutorial you MUST purchase it from AMI.
Filters- VM Instant art spiderwebDSB Flux bright noise bubbles, and linear transmissionMuras Meister copiesEye Candy 4000 gradient glow(optional)
New Image-600x600 transparent
Grab your paint bucket tool and make your background black and your foreground a color from your tube. Change the foreground to a gradient and find the one that says foreground/background. Style is sunburst, repeats 0, invert unchecked. Flood fill your background with the gradient.
Preset shape tool-set to rectangle, width of 10, anti-alias checked, foreground a color from your tube, background null. Draw out a rectangle about the size of mine and place about in the center of the canvas. Right click this layer and convert to raster.
Grab your magic wand tool-mode is add, match mode rgb, tolerance 20, feather 0, contiguous and anti-alias checked. Click inside the rectangle. Go to selections-modify-expand by 3.Add a new raster layer and grab your pait bucket tool. Flood fill with the same gradient you used earlier. You may have to reset your colors again to do this. KEEP SELECTED.
Go to effects-plugins-vm instant art-spiderweb- Rays 16, rings 32, merging 85. KEEP SELECTED. Go to plugins again and find dsb flux bright noise-intensity 49 and click mix. Selections-select none. Move this layer under your frame layer
If your tube has a close up then grab it now and copy and paste it as a new layer. If it doesnt then just use the tube you chose. Move the tube, whichever one it happens to beunder the rectangle layer but above the fill for it. Positon it how you want so it shows through the rectangle. If needed resize by grabbing the pick tool, the arrow tool, and drag the box by a corner to the size you want it. See my tag for reference.
Click on your rectangle layer and go to effects-edge effects-enhance. Now go effects-3d effects-drop shadow, 0,0,100,8, black.
Hide your background layer, the one we filled in the beginning, and then right click on the top layer and go merge visible. Now unhide your background layer. You should have two layers now.
Duplicate your merged layer, which should be the frame with the close up and the fill we made for the frame. On the original, go image-resize-50 percent, all layers uncheckedand lock aspect ratio checked. go to muras meister copies-in the drop box below the preview screen find Tiling and click it. Leave the settings as they are.
Duplicate the copies layer and on the original go to dsb flux-bubbles-19,50,50,50. On the same layer go to effects-texture effects mosaic antique-columns and rows 25, symmetric checked, tile diffusion 70, grout width 2, grout diffusion 10. Now double click this layer and change the blend to hard light.
Go back to the copies layer and double click it and lower the opacity to about 47.
Duplicate your merged layer again, this time twice so you should have a total of three. On the bottom copy go to your plugins-dsb flux linear transmission-vertical, size 4, offset 6,blend 0. Repeat this on the middle copy of the merged layer but this time click horizontal instead of vertical.
Now copy and paste your main tube as a new layer. Resize if needed and position to one side or how you think it looks best. Give it a drop shadow of choice.
This is the time if you wish to resize your entire tag to do so. Go to image-resize, make sure you choose pixels in the drop box, make sure all layers and lock aspect ratiois checked. Change the pixels to the size you want and click ok.
Add your copyright so it is clearly visible. Add your name in a font of choice. I used a thick font first in all caps. Convert to raster. Then added a gradient glow from eye candy 4000 with a size of 3, soft corners 25, opacity 100, then chose a light color first and added another color tab with a darker color last. If you dont have this filter you can play around with using a colored drop shadow.Next i added the name again in a small script font and gave it a black drop shadow.
Thats it, you are done! I hope you enjoyed my tutorial.
©ANGEL FLOWER 2009