Tuesday, February 24, 2009

Angel of Rock


This Tutorial was written by me, Angel Flower, from my own ideas. Any similarities to others is coincedence. All my tutorialsare registered with TWI.
For this tutorial you will need
A tube of choice. I am using the work of Myka Jelina. In order to use the image in this tutorial you MUST purchase it from CILM. http://www.cilm.com/
Grungy type mask of choice. I am using a mask by WeeScottLass, wsl_mask60. http://weescotslasscreations.blogspot.com/
Filters-DSB Flux linear transmission, Eye candy 4000(optional), Muras Meister Copies
New image-500x500-transparent.
Flood fill with black.
Add a new layer and choose a color from your tube. Flood fill this layer with the color you chose.
Go to layers-load/save mask-load mask from disk. Find your mask in the drop box,source luminance, fit to layer, and hide all checked.
Right click on the mask layer and choose merge group. Now resize by going to image-resize-about 115 percent, all layers unchecked.
Duplicate this layer and go to effects-plugins-dsb flux-linear transmission-4,5,50,horizontal. The go to effects-edge effects-enhance.
Grab your text tool and in a font and color of choice, type out the words Angel Of Rock or words of choice.
Right click this layer and convert to raster. Center it in your tag and duplicate. Move the duplicate below the orignal just a little and position more to the left of the tag.Duplicate this one and move the duplicate right next to it. Now right click on this layer and go merge down. Do this until all three text layers are merged into one.
On your text layer, go to effects, plugins, muras meister copies, in the preset drop box, the one below the preview screen, choose tiling, then in the other three it is line, tile,and blend. Settings are1,50,50,0,0,0,100,0,100,-19,0,30,0. Still on this layer, apply your mask again as we did earlier and merge group.
Add a new layer. On this layer i used my picture tubes tool and add a flower that i had in my picture tubes in the top left corner. Position how i have mine, so that only half of the flower can be seen. See my tag for reference. Once happy, duplicate this and go image, mirror. Merge these two layers together. Duplicate the merged layer and go image flip. And merge these two so now all your flowers should be on one layerand there should be one in each corner. Right click on this layer and change the blend to hard light and the opacity to 15.
Add your tube as a new layer. Resize if needed. Center it in your tag. Give it a drop shadow of choice. I used eye candy 4000 shadow lab with these settings-direction of 189,28.80,59,3.11,0,color black, draw only checked.You can get a similar effect using the normal drop shadow effect also if you dont have eye candy 4000.
Now is the time if you wish to resize your entire tag to do so. Go to image-resize-choose pixels, and make sure all layers and lock aspect ratio is checked, then change it to the size you want.
Add your copyright so it is clearly visible.
Add your name. Give your name a different drop shadow.
Thats it, save and you are done!

Thursday, February 19, 2009

Spring means Frogs


This Tutorial was written by me, Angel Flower, from my own ideas. Any similarities to others is coincedence. All my tutorialsare registered with TWI.

For this tutorial you will need

A tube of choice. I am using the work of Joan Pelaez. In order to use the image in this tutorial you MUST purchase it from CILM. www.cilm.com

Scrapkit. I am using a PTU scrapkit call Spring Garden by Foxy. You can purchase the kit here http://digitalchaos.net/store/

New Image-600x600-transparent.

New layer. Flood fill with white.

Choose one of the papers and paste as a new layer. If it is too big, resize by going to image-resize-about 85%, make sure it says percent and not pixels. Make sure all layersis unchecked.

If it is still too big you can repeat this process. If it is a little too small, then use the pick tool, the arrow, and drag it by one of the corners to the size you need to fill the background.

Paste a frame as a new layer. If needed resize using the pick tool and again drag it by one of the corners to the size you want.

Choose a paper for the inside of the frame and paste it as a new layer. If needed resize. Grab your magic wand, mode is add, match mode rgb, tolerance 20, feather 15.

Make your frame layer active and click inside the frame with the magic wand. If you dont see the little marching ants around the entire insde of the frame, click the empty space that is notselected. You may have to do this a few time in different spots. Once the inside is selected, go to your paper layer for the frame and go selections invert, and hit delete. Now you should be left with the paper inside the frame. Select none.

Move this layer below your frame layer. Make your frame layer active and give it a drop shadow of 0,0,75,10 and black.

Make a new layer just above the background paper layer. Paste one of the flower vines as a new layer and postion to one side so the flowers stick out from under the frame. Try to center this on the side. See my tag for reference. Duplicate and go image mirror. Now you should have one on each side.

Paste the lily as a new layer and move this layer above the paper and frame layer. Resize if needed and place at the bottom center of the tag.

Paste the frog as a new layer and resize. Paste on one side of the lily. Duplicate it and go image mirror. Now you have one on each side.

This next part is optional depending on what kind of tube you are using. I am using a sitting tube so i pasted one of the benches as a new layer and moved it below the frame but above the paper. Resize it to your liking.

Now paste your tube as a new layer. If it is a sitting tube like mine, move it above the frame layer. Resize if needed and position so it is sitting on the bench. See my tag for reference. Now, my tube came with a frog so i pasted a couple of the lilys under the tube layer so it looks like the frog is sitting on them.

Paste one of the mushrooms as a new layer and resize. Make sure this layer is below the frog layers. Position to one side as i have mine. Duplicate and mirror.

Paste the journal tag as a new layer. Resize and bring this layer above the frame layer. Position in the top left corner.

Grab one of the buttons and paste as a new layer. Resize and duplicate. Position one at each end of the ribbon on the journal tag. See my tag for reference.

Give your tube layer a drop shadow of choice.

Now is the time if you wish to resize your entire tag to do so. Go to image resize-choose pixels, make sure lock aspect ratio and all layers are checked. Change it to the size you want. I usually use 500x500.

Add your copyright so it is clearly visible.

Add your name and position on to the journal tag we pasted. Once happy with it, give it a drop shadow of choice.

Thats it, save and your done.

©Angel Flower February 2009

Sunday, February 15, 2009

radial goth fae


This Tutorial was written by me, Angel Flower, from my own ideas. Any similarities to others is coincedence. All my tutorialsare registered with TWI.

For this tutorial you will need

A tube of choice. I am using the work of Amy Brown. In order to use the image in this tutorial you MUST purchase it from CILM.

Filters-Fantastic Machines paint engine

DSB Flux- bubbles and radial mosaic

Xenofex2- constellation(optional)

New Image-500x500-transparent

New raster layer. Flood fill with white.

Choose a color or gradient to match your tube for your foreground color. We will use this for our background.

Add a new layer and flood fill with the color you chose.
Go to effects-plugins-fantastic machines paint engine. Just click random till you find one you like.

Again go to effects-plugins-this time dsb flux bubbles with these settings-4,75,50,0.

Still on the background layer, go effects-reflection effects-kaleidoscope-image area settings are -100,66,117,-15, and kaleidoscope settings area are 6,0,31, and choose wrap.

This next part is optional, I used xenofex2 constellation under plugins with these settings-2,2,19,93,75, twinkle rotation 45, keep original clicked and click random seed once. This is just to give the background a little dressing up.

Now paste your tube as a new layer. Duplicate it and hide one of them by clicking the eye next to it. On the visible one, position in the center of your tag. Do not resize it. Double click on this layerand change the blend to hard light and the opacity to 60. Now Go to effects-plugins-dsb flux-radial mosaic-7,30,13.

Duplicate this layer and go image-mirror.

Unhide the other tube and resize it using the pick tool, the little arrow tool, and drag the box by a corner to the size you want it. Position how you like or see my tag for placement. Once happy, duplicate this layer. Go image-mirror. Position toward the top of your tag and slide it over so you can see the face in the part we used the radial mosaic on. See my tag for reference. Change the blend mode to lighten and the opacity to 20. See my tag for how this should look.

Now is the time if you wish to resize your tag to do so. Go to image-resize-make sure lock aspect ratio and all layers is checked, change the percent to pixels and choose the size you want, when you change one size, the otherwill automaticly adjust.

Add your copyright so it is clearly visible.

Add your name. Give it a drop shadow, i used -2,-2,100,5,black.

Save and you are done!

Tuesday, February 10, 2009

Rotating Flower Power


CLICK THE TAG to see it full sized.
This Tutorial was written by me, Angel Flower, from my own ideas. Any similarities to others is coincedence. All my tutorialsare registered with TWI.

For this tutorial you will need

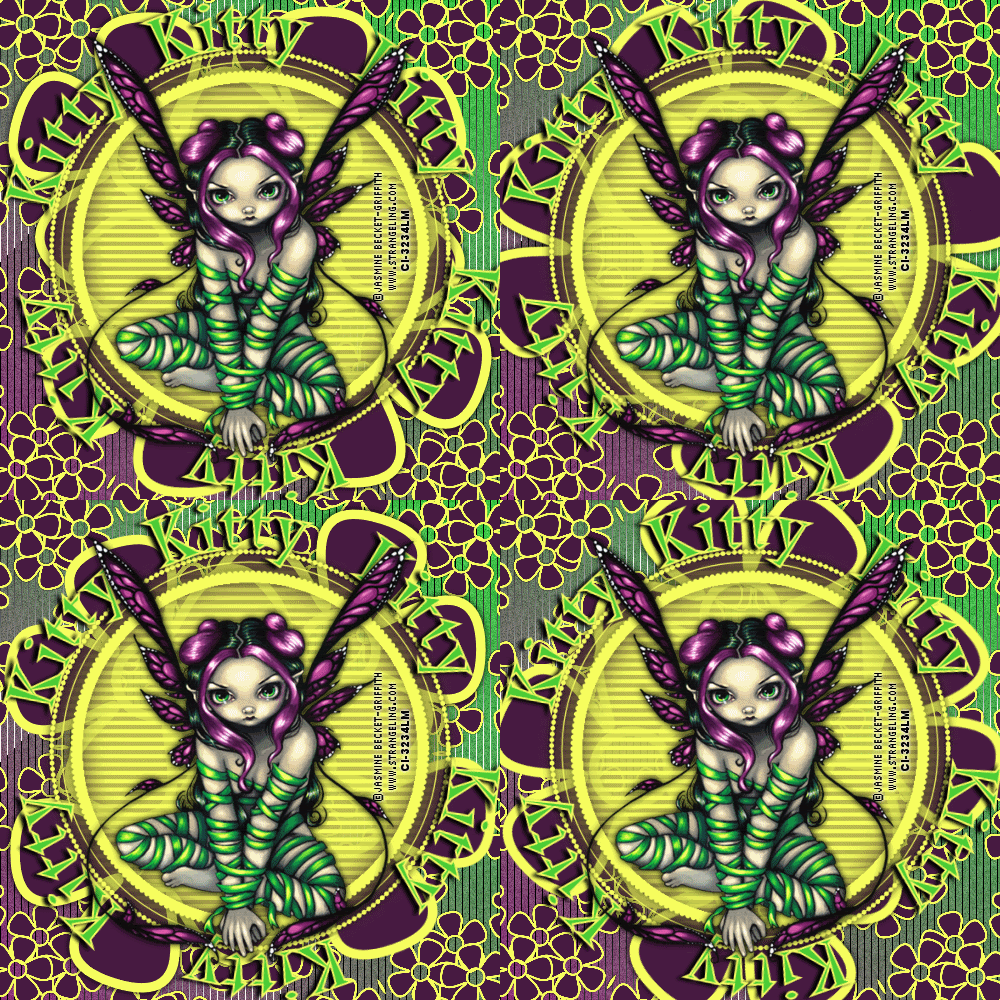
A tube of choice. I am using the work of Jasmine Becket Griffith, In order to use the image in this tutorial you MUST purchase it from CILM. http://www.cilm.com/

Filters- Fantastic machines paint engineandrews filters 8 tow the line(there is another filter set with tow the line but i cant remember what it is)

Mask. I am using a mask by Weescotlass, it is wsl_mask53. You can find her masks here http://weescotslasscreations.blogspot.com/ Save the mask to your psp masks folder.

Animation shop(optional)

New image-500x500-transparent

Choose two colors for your foreground and your background that match your tube. In the foreground, change it to gradient, and in the drop box choose foreground/background, angle 45, repeats 0. Add a new layer and flood fill with your gradient.

Go to effects-plugins-fantastic machines paint engine, just keep hitting random till you find one you like.

Now go to effects-plugins-andrews filters 8-tow the line-settings are 80,54,48,9.

Add a new layer. Flood fill with another color from your tube. Go to layers-load/save mask-load from disk. Find the mask you chose in the drop box, hide all, source luminance and fit to canvas all checked. Right click on the mask layer and go merge group.

Give it a drop shadow by going to effects-3d effects-drop shadow. I used 0,0,100,10,black.

Grab your preset shape tool and choose one of the flower shapes. I used flower2. Width is 10, create as vector and anti-alias checked, retain style unchecked, line style is solid. Choose a bright color for your foreground and a darker color for the background. Draw out a flower shape.

Move this layer below your mask layer and position so part of it sticks out of the top left side. See my tag for placement. Duplicate this layer and go image-mirror. Then go image-flip. You should now have another flower in the bottom rightside of the tag sticking out from under your mask. Again, see my tag for placement.

Give each flower a drop shadow. Duplicate the top flower layer. Right click on the top one and choose merge down. Now you should have one layer with two flowers and one single flower on a layer of its own.

Make the single flower layer active. Position it to the top right of the tag so it sticks out of the mask. You may need to use the pick tool, the arrow, to slightly rotate it. Put it how you think it looks best. Once happy, duplicate it and go image mirror, and image flip. This should put it in the bottom left of the tag. You may need to reposition it a little. Once happy, right click and choose merge down again. Now you should have two merged flower layers.

Merge the two flower layers together the same way so now you have just one. Duplicate this layer. On the bottom layer, go to effects-reflection effects-kaleidoscope-settings under image area are -100, -100, 151,-90, the settings under the kaleidoscope settings are 6,0,29 and choose wrap.

If you want your tag animated, follow these steps:
Okay, bear with me here. Duplicate the merged flower layer three times for a total of four. Now we are going to start on the bottom layer. Leave the bottom one the way it is and click on the second layer, just above the bottom one. Go to image-free rotate-left-45 degrees-both boxes unchecked. On the next layer, which should be the third from the bottom one, repeat the rotate but make it 90 degrees. And on the fourth layer, which is the top one, repeat the rotate changing it to 135 degrees. Hide all the merged flower layers except the bottom one by clicking the eye next to each one.

Add your tube and resize it if needed. Position so it is somewhat inside the mask layer. See my tag for reference. Give it a drop shadow.

I didnt resize my tag but if you want to with yours then now is the time to do it. Go to image-resize-make sure all layers and lock aspect ratio is checked. Choose pixels and change it to the size you want.

Add your copyright so it is clearly visible.

Now to add your name like I did, you need to grab your preset shape tool and set it to ellipse. Width of 14, colors dont matter. Draw out a circle the same size about as your mask. If needed, position it so it is directly over your mask. Now grab your text tool and hover it over the circle we just made until you seethe A with a half circle type line under it, then click. Add your name several times putting a couple spaces in between each one. You may have to play around with spacing to till you get it just right. Once happy, click the plus sign next to this layer, it will change to a minus sign and You will now see one layer with the circle, and another with the text. Click the eye next to the circle layer to hide it. On your tag you should now only see your name. Click the minus sign, it will change back to a plus sign and it is now back to showing one layer. Right click and convert to raster. Give it a drop shadow of choice.

Now you can leave as is and save and be done, or you can animate.

To animate, open animation shop. In psp, make sure all the flower layers except the bottom one are hidden. click on the bottom flower layer. Go to edit, copy merged.In animation shop, paste as new animation. Back to psp, hide the bottom layer and unhide the second layer, the one just above, and click it to make it active. Go to edit copy merged.Back to animation shop, edit-paste after current frame. Back in psp, hide this layer and unhide the third layer and make it active. Edit copy merged. Back to animation shop, edit paste after current frame.One more time back to psp. Hide this layer and make the top flower layer active and unhide it. Edit copy merged. And back to animation shop, paste after current frame.Edit-select all. Animation-frame properties-40. View animation and save and you are done!

©Angel Flower February 2009


Valentine Treat


This Tutorial was written by me, Angel Flower, from my own ideas. Any similarities to others is coincedence. All my tutorialsare registered with TWI.

For this tutorial you will need

Scrapkit. I am using a PTU kit by Melisa called Say it With... You can purchase it here http://cottoncandykreations.com/shop/

Mask. I am using a mask by Weescotlass wsl_mask214. http://weescotslasscreations.blogspot.com/ Save the mask to your psp masks folder.

A tube of choice. I am using the work of Keith Garvey, you must purchase a license from MPT, http://www.mypsptubes.com/, in order to use his work.


New image-600x600-transparent.

Flood fill with white.

Choose a paper for your background and paste as a new layer. If it is too big, go to image-resize-about 85%-all layers unchecked. If it is still too big you can repeat this step.

Go to layers-load/save mask-load from disk. In the drop box, find the mask, Source luminance, hide all, and fit to canvas all checked. Invert transparency unchecked.

I then resized my mask layer by 115%. Right click on the mask layer and choose merge group.

Duplicate your merged mask layer to make it stand out more. Right click on the top one and go layers- merge down.

Paste a frame as a new layer. If needed, resize it using the pick tool, arrow tool, and drag the box by a corner to the size you want. Position so it is centered over your masked layer.

Give your frame layer a drop shadow by going to effects-3d effects-drop shadow. I used 0,0,100,10,black.

Paste one of the butterflies as a new layer. Resize if needed and position on the top left of the frame.

Make your white background active and paste the heart charms as a new layer. Resize if needed. I left mine in the position they were in when i pasted them.

Make your frame layer active and paste one of the candles as a new layer. Resize it and position at the bottom of your tag on one side of the frame. See my tag for reference. Duplicate this layer and postion on the other side of the frame. Again see my tag for placement.

Give each candle a drop shadow, this time I used 0,1,70,black. On the second candle i used -1 instead of 1.

Paste a flower as a new layer and resize. Move this layer below your frame layer. Position so it sticks out of one side toward the bottom. Duplicate several times and arrange them along the side of the frame. Iduplicated mine four times for a total of five. See my tag for placement.


Now, starting with the top flower layer, right click and go merge down. Do this on each flower layer except the very last one, until only the flowers are all on one layer.

Duplicate this layer and go image mirror. Now you should have flowers on both sides.
You will need to grab your eraser tool, i used a size of 32, to erase the bits of flowers on both layers that show inside of the frame.

Paste your tube as a new layer. Resize if needed. Position how you like or how i have mine if you are using a similar tube. Give it a drop shadow of choice. Make sure this layer is at the top.

Paste any other embellishments you wish. I pasted some hearts on each side of the candles.

Now is the time if you wish to resize your entire tag to do so. Go to image-resize. Choose pixels instead of percent, make sure lock aspect ratio and all layers is Checked. Change the size to what you want, i use 500x500. When you change one theother automaticly changes.

Add your copyright so it is clearly visible.

Add your name. Position how you like and give it a drop shadow.

Thats it, you are done!

©Angel Flower February 2009

Monday, February 9, 2009

Purple Rose


This Tutorial was written by me, Angel Flower, from my own ideas. Any similarities to others is coincedence. All my tutorialsare registered with TWI.

For this tutorial you will need
Scrapkit. I am using a PTU kit called Cover Me in Roses by Crimson Butterfly Scrapz, formerly known as Giggly Girl Scrapz. You can purchase the kit here: www.digitalchaos.net

A tube of choice. I am using the work of Myka Jelina. In order to use the image in this tutorial you MUST purchase it from CILM. www.cilm.com

New image-600x600-transparent.

Flood fill with white.

Paste a paper as a new layer for your background. If it is too big, resize it by going to image resize, start with about 85%, make sure all layers is unchecked.

Paste a frame as a new layer. If needed, resize it using the pick tool, the arrow, and drag the box by a corner to the size you want.

Choose a paper for the inside of the frame. Make your background paper active, and paste the new paper as a new layer. Position it how you want to show through the frame.

Make you frame layer active and grab your selection tool. Make sure it is set to rectangle. Mode is add, feather 0. Draw a rectangle over your frame so it is about the same sizewithout going over the outer edge. Make your paper layer active and go selections-invert, and hit delete. Select none.

Make your top layer active. Open the flower ribbon and paste as a new layer. Resize it using the pick tool, the arrow, and drag it by a corner to the size you want. Position at the top of your tag. See my tag for placement. Duplicate this and go to image flip. You should now have one on top and one on bottom.

Place some roses as a new layer and arrange them inside your frame however you want. I put two on one side, two in the middle and two on the other side. To delete the parts that hang out, grab your selection tool again, same settings as before and draw the selection around your frame. Go selections-invert, and on each rose layer hit delete. Select none. Move the roses below the frame layer.

Now paste charm as a new layer. If needed resize a little. Place to the left side inside the frame. Duplicate it, and mirror and position inside the frame as i have mine. Give each charm a drop shadow of choice.

Paste your tube as a new layer. Resize it if needed. Position to the right side of your frame.
Make sure this layer is above your frame layer. Give it a drop shadow.

Now is the time to resize your entire tag if you wish to do so. Go to image-resize-choose pixels in the drop box, make sure lock aspect ratio is checked, then change the size to what you want, i use 500x500. When you change one, the other should automatcily change. Make sure all layers is checked.

Now add your copyright so it is clearly visible.

Add your name. Give it a drop shadow.

Thats it, you are done!

©Angel Flower February 2009

Brown eyes


This Tutorial was written by me, Angel Flower, from my own ideas. Any similarities to others is coincedence. All my tutorialsare registered with TWI.

For this tutorial you will need

Scrapkit. I am using a PTU scrapkit called Coffee Kisses by Kellsinater which you can purchase here: http://digitalchaos.net/

A tube of choice. I am using the work of Jennifer Janesko.In order to use the image in this tutorial you MUST purchase it from CILM. www.cilm.com

New Image-600x600-transparent.

Flood Fill with white.

Paste a paper of choice as a new layer. This will be our background. If the paper is too big, go to image-resize-make sure it says percent,start with about 85%, make sure all layers is unchecked. If the paper is still too big, you can repeat this step.

Choose a frame and paste it as a new layer. Resize it if needed using the pick tool, the little arrow tool, and drag the box by a corner to the size you want.

Choose a paper for the inside of the frame. Grab your magic wand, mode is add, match mode rgb, tolerance 20, feather 0, anti alias checked,click in the empty space of your frame, mine has two empty spaces so i clicked insideboth. Go to selections-modify-expand by 4.

Paste your paper as a new layer and go selections-invert-delete. Select none. Move this layer below the frame layer.

Give your frame layer a drop shadow, I used 0,0,100,5,black.

Make your background paper layer active. Paste a flower as a new layer. Resize if needed.


Position to the left of your tag so it sticks out from under the frame. See my tag for reference. Duplicate it and go image mirror, then postion it next to the first one. Again see my tag for placement.

Paste one of your doodles as a new layer and position to the right side of your frame. Move this layer below your flower layers. Duplicate it and go image mirror. Nowyou should have one on each side.

I then pasted a second doodle and positioned it kind of in the center of the tag but a little to one side. I then duplicated this layer and went to image mirror. Position in the center but a littleto the opposite side of the other one. See my tag for reference. Merge these two layers together but right clicking whichever one is on top and choose layers-merge down. Duplicate and go image flip and position so it matches the one that sticks out the top. Again, see my tag for placement.

Give the two doodle layers that we didnt merge a drop shadow.

Paste your tube as a new layer. I have two parts to my frame. For the left side, i positioned my tube so the eyes were showing through the frame. Duplicate your tube and go image mirror. This is for the right side of the frame. I resized my tube and positioned so the face shows through the frame. Once happy with placement of both sides, make your frame layer active.


Click in each side with the magic wand, selections-modify-expand by 6. Selections invert. Make the first tube layer active and hit delete. Now make the other tube layer active and hit delete. Select none.

Move both tube layers below the frame but above the paper.

Paste a bow as a new layer and position on the top center of the frame. Give it a drop shadow.

Make your paper background active. Paste a heart as a new layer. Resize it and position to the right of the tag so it sticks out of the frame. See my tag for reference.

Make your frame layer active and paste the journal block as a new layer. Position on the bottom center of your tag just below the frame.

Now is the time to resize your entire tag if you wish. Go to image-resize, in the drop box choose pixels, make sure lock aspcet ratio and all layers are checked. Change it to the size you want, i chose 500x500. When you change one, the other should automaticly change.

Add your copyright so it is clearly visible.

Add your name. Give your name a drop shadow, I used -1,-1,100,5,black.

Thats it, you are done!

©Angel Flower February 2009