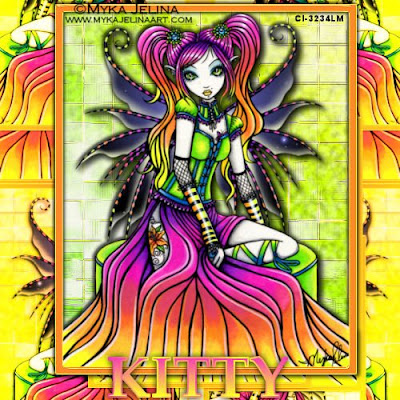
 Click the tag to see it full size.
This Tutorial was written by me, Angel Flower, from my own
ideas. Any similarities to others is coincedence. All my tutorials
are registered with TWI.
For this tutorial you will need
A tube of choice. I am using the work of Myka Jelina. In order to use the image in this tutorial you MUST purchase it from CILM. http://www.cilm.com/
Mask of choice, I am using a mask by Essex girl http://www.essexgirl.uk.com/default.htm Just click on masks and go to page 18 if you want the one i used.
Filters-eyecandy 4000, Muras meister copies,
New image-500x500-transparent.
Grab your preset shape tool and set to rectangle, create as vector checked, width of 10, Foreground a color from your tube, background null.
Draw our a rectangle about the size of mine. Position in the top center. Right click this layer and convert to raster.
Get your magic wand tool. Mode is add, match mode is rgb, feather 0, tolerance 20. Click in the center of your rectangle. Selections, modify, expand by 5. Keep selected.
Add a new layer. Pick two colors from your tube for you foreground and background. Change the foreground to gradient, linear, angle 45, repeats 0. Flood fill the new layer with the gradient. Keep selected.
Add your mask by going to layers, load/save mask, load from disk, in the drop box find the mask you chose, fit to canvas, hide all, and source luminance checked. Now right click on the mask layer and merge group. Keep selected.
Make a new layer and flood fill with white. Drag this layer below the masked layer. Duplicate it and hide the bottom one by clicking the eye next to it. DO NOT DESELECT YET.
Duplicate your masked layer three times for a total of four. Right click on the bottom mask layer and merge down. This should merge it with the visible white layer we filled. Hide this layer and
unhide the other white layer. Put this white rectangle layer above the one we just merged. Now you should have from the bottom, not including the background, one merged mask layer, one white rectangle layer, and three of the masked layers, and the colored rectangle frame we made.
Making sure your rectangle selection is still there, the marching ants, on the top masked layer, go to plugins, eyecandy 400, HSB noise, hue 0, saturation 71, brightness 34, opacity 0, lump width and height 8.32, pattern is smooth fractal, roughness is 50, seamless tile checked, click random seed once. Hide this layer and Repeat this on the next two masked layers, clicking random seed once each time. Leave the third mask layer visible. Finally go selections, select none.
Now drag the merged mask layer, the one we merged with the white rectangle layer, to just under the rectangle frame. Make the rectangle frame layer active and paste your tube as a new layer. Resize it if needed using the pick tool, the arrow tool, and drag it by a corner to the size you want so it fits nicely in the rectangle frame. See my tag for reference. Once happy with it, use the eyecandy 4000 shadowlab to give it a drop shadow of choice.
Now click on your tube layer and merge down to your rectangle frame. Duplicate this merged layer. On the bottom one, merge it down with the merged mask layer. Drag this layer to the bottom, just above the white background. Go to image resize, 75%, all layers unchecked.
Go to Muras meister copies, 9,40,55,0,0,0,100,0,0,30,0, and the three little drop boxes should be shift mode, tile mode and blend mode. Duplicate and go image mirror. Now right click and merge down. Right click again and change the blend mode to hard light.
On the background layer, choose two different colors for your foreground and background, change to gradient, sunburst, repeats 0. Flood fill the background with this gradient.
Make your top layer active, this should be the tube merged with the rectangle. Give it a drop shadow of 2,2,77,5, black. Repeat the drop shadow changing to -2.
Add your copyright so it is clearly visible. Add your name. Give it a drop shadow of choice.
Now you can save and leave as is, or you can animate. To animate, make sure your top two masked layers are still hidden. Make the visible one active and go to edit, copy merged.
Open animation shop and go edit, paste as new animation. Back in psp, hide this layer and make the middle masked layer active and unhide it. Edit copy merged, back to animation shop, edit , paste after current frame. and one last time back to psp, hide this layer and unhide the top masked layer and make it active. Copy merged and back to animation shop, paste after current frame. Go edit, select all. Animation, frame properties set to 20. now view animation and save.
Thats it, your done!
