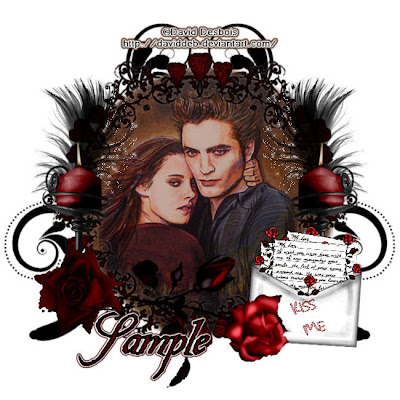
Click the tag to see it full size.
This Tutorial was written by me, Angel Flower, from my own ideas. Any similarities to others is coincedence. All my tutorialsare registered with TWI.
For this tutorial you will need A tube of choice. I am using the work of David Desbois http://daviddeb.deviantart.com/. You must have permission to use his work.
Scrapkit- This kit is called My Fallen Valentine by Crimson Butterfly Scrapz. You must purchase this kit at http://www.digifoxsstudio.net/ or http://www.digitalchaos.net/ to use it.
Filters used-Xenofex2 constellation(optional) Eye Candy 4000 gradient glow(optional)
New Image- 600x600 transparent. Copy and paste the frame3 as a new layer. Resize it by going to image-resize-80 percent, all layers unchecked, lock aspect ratio checked. Then resize again by 85 percent.
If you are going to use a paper for your fill, paste it as a new layer. Resize by 70 percent. Move this below your framelayer. Make your frame layer active. Grab your selection tool and set to ellipse, feather 0, anti alias checked. Drawa selection around your frame without going outside the edge of the frame. This may take a few tries to get it quite right.Selections invert, on your paper layer hit delete. Now you should only have the paper inside the frame. I chose to use a color for my fill. Instead of pasting a paper, I drew my selection, added a new layer and flood filled it with my color. Then i moved my fill layer below my frame layer.
I gave my frame a very slight white drop shadow of 0,0,50,5.
Paste your tube as a new layer. If it needs to be resized use the same method we did above and start with about 85 percent. If its still too big, repeat this, if it is too small, undo and change the percentage. The other way to resize if you need just a little is to grab your pick tool, grab the box around the tube by a cornter and drag it slightly to the size you want. Dont worry if just a little of your tube hangs over, we will fix that. Make your fill layer active. Go to selections, select all, selections float,then defloat, selections invert and hit delete on your tube layer. Make sure this layer is above the paper but below the frame.
Open candle1 and paste as a new layer. Resize it about like mine and place on one side of your tag. See my tag for reference.Once happy with the placement, duplicate and mirror. You may need to postion this one slightly. Now you have one on each sideof your tag.
Copy and paste the rose3 as a new layer. Resize and position on the left side of the tag so it covers the bottom of the candle. See my tag for placement.
Copy and paste rose2 as a new layer. Resize just a little and go to image free rotate, 90 degrees right, both boxes unchecked. Positiontoward the bottom of the tag with the end of the stem further toward the other rose we placed. Move this layer below the other rose layer. Again see my tag for how this should look.
Copy and paste the envelope as a new layer. Resize it about like mine. Move below the rose layer. Position it so it sits on the right side of the tag. I slighly rotated mine using the pick tool. Then i went to effects, edge effects, enhance. See my tag for how this looks.
Copy and paste the feather2 as a new layer. Resize it to your liking or about like mine. Move this layer below the candle layers. Position on the left side of the tag so it sticks out above the candle some. See my tag for placement. Once happy with it, duplicate it and mirror. Put into position if necessary.
Give each feather the same drop shadow we used earlier. Now the next part is optional. I added a slight constellation to mine using xenofex2,1.98, 22, 9, 0, 80, 75, rotation 45, keep original, and click random seed once. Do this for each feather.
I then added a flourish1 to mine and moved it under all the layers. I positioned it to the right of the tag, resized it, then duplicated it and mirrored it.
I did not resize my tag but if you wish to resize yours now is the time to do so. Go to image resize, all layers and lock aspect ratio both checked. Change the percent to pixels and choose your size. When you change one, the other automaticly changes.
Now add your copyright info so it is clearly visible. I added a gradient glow of 3 to mine from eye candy.
Now add your name in a scripty type font. Postion where you like or how i have mine. If you wish to add a glow, convert to raster and go to eye candy 4000 gradient glow, under the basic tab 3,25,100, under the color tab the first tab should be white, I added a second white tab, and then i added a third taband changed the color on the third one to the dark red in the name, opacity 100. You may also give your name a black drop shadow if you wish.
Thats it, you are done.
©Ange Flowers Tutorials March 2010
©Ange Flowers Tutorials March 2010