 This Tutorial was written by me, Angel Flower, from my own
ideas. Any similarities to others is coincedence. All my tutorials
are registered with TWI.
For this tutorial you will need
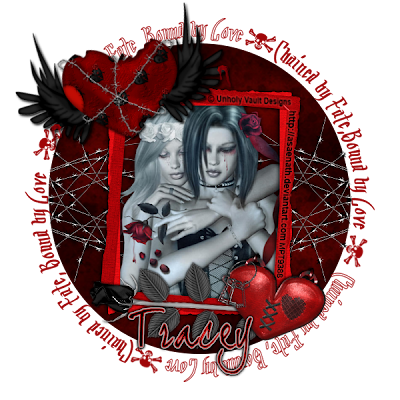
A tube of choice.I am using the work of Unholy Vault Designs. In order to use the image in this tutorial you MUST purchase it from MPT.
Scrap kit- I am using an awesome kit called Broken Valentine by Broken Dreamz Scrapz, you must purchase this kit from The Creativity Box. You can visit her site here Filters-eyecandy 4000 optional
A Note: Anytime you need to resize something,such as an element or paper, you may do it one of two ways. The first method is by going to image-resize. Under pixel dimensions, make sure the drop box says percent, Lock aspect ratio should be checked and all layers unchecked, then change the width and height under the pixel dimensions the percent you think will work. I usually start with about 80 percent. If it is still too big, you can repeat the steps, adjusting the percent if needed. If it is too small you can undo by going to edit undo, and adjust the percent as needed.
The second way to resize something is to grab your pick tool, the little arrow, click on the layer you wish to resize and as long as you have clicked the pick tool, you should see a type of box around the layer or element or whatever you are resizing.
Grab the box by a corning and drag it to the size you want. Keep in mind that most artisits do not allow you to make the tubes bigger, and be sure to check the tou for scraps as well.
New Image-600x600 transparent
Open element 41 and paste as a new layer. Resize by about 85 percent.
Choose a paper and paste it as a new layer. Drag this under the wordart layer so you can see what you are doing. Resize by about 75 percent.
Click on the wordart layer. Grab your selection tool, if it is set to the magic wand then click the little arrow next to it and choose selection. Type is ellipse, mode is add, feather 0, anti alias checked. Click in what you think is the center of the word art and draw an ellipse to the edges of the wordart. If you look at my tag, you will see how the paper looks which will give you an idea of how the selection should look. It took me a few tries to get it just right. If you make a mistake just go to selections, select none and try again. Once you are happy with the selection, go to selections invert, and make the paper layer active and hit delete.
Select none.
Open element 20, the red rectangular frame, and paste as a new layer. I did not resize mine. Give it a drop shadow of choice by going effects, 3d effects,
drop shadow. I used 0,-2,100,10,black.
Paste element 1 as a new layer and resize as needed. Position at the top left of the frame and rotate it slightly using the pick tool. Give this a drop shadow of choice.
I used -1,2,100,5,black.
Grab element 58 and paste as a new layer. Resize if needed, position at the bottom right corner of the frame and rotate the opposite direction as the one we just did. Give this a drop shadow, I used 1,-2,100,5,black.
Open one of the roses, I chose number 42. Paste as a new layer. Resize it and go to image free rotate, 90 degrees left. Position across the bottom of the frame. Move this layer under the heart layer. Give this a drop shadow, I used 0,0,100,5,black.
Paste your tube as a new layer. Resize if needed but dont worry if some of it hangs out of the frame. Move it below the frame layer and postion it so the part you want shows through the frame. Click on your frame layer and grab your magic wand. Mode is add, match mode RGB, tolerance 20, feather 0. Click in the center of your frame layer. Go to selections, modify, expand by about 4. Keep selected and make your tube layer active by clicking it. Go to selections, invert, and hit delete on your keyboard. Select none.
Give your tube a drop shadow. I used 0,0,100,10,black.
Open element 30. Paste as a new layer and move this layer under the frame layer. Position this to the left of the tag so the ends hang over the paper a little. We will fix that part in minute. Duplicate the layer by going image duplicate, and go image mirror. This should now be directly on the opposite side of the tag. If needed place it into position. Once happy with it, go layers merge down. They should both be on one layer now.
Duplicate the merged layer and go image flip. If needed move this layer into position so it looks like mine, or move it to how you like it.
Merge this layer with the other one again by going layers merge down.
Grab your eraser tool, shape is round, size about 50, hardness 80, step 1, density 100, thickness 100, rotation 0,opacity 100. Carefully erase the bits of wire hanging over the edge of the paper on both sides.
Now is the time if you wish to resize your tag to do so. Go to image resize, make sure all layers and lock aspect ratio is checked. Change the percent to pixels and choose your size.
Add your copyright so it is clearly visible.
Add your name in a font of choice. I chose to give the name a glow using eye candy 4000 gradient glow, with a size of 3 and using two colors. If you dont have this just give it a drop shadow. If you used darker colors like i did you may want to give it a light gray or white shadow instead of black.
thats it, save and you are done.
©angelflower January 2011
 click to see the tag full size
This Tutorial was written by me, Angel Flower, from my own ideas. Any similarities to others is coincedence. All my tutorials are registered with TWI.
For this tutorial you will need
A tube of choice.I am using the work of Elias Chatzoudis. In order to use the image in this tutorial you MUST purchase it from MPT.
Scrap kit- I am using an awesome kit called Broken Valentine by Broken Dreamz Scrapz, you must purchase this kit from The Creativity Box. You can visit her site here A Note: Anytime you need to resize something,such as an element or paper, you may do it one of two ways. The first method is by going to image-resize. Under pixel dimensions, make sure the drop box says percent,Lock aspect ratio should be checked and all layers unchecked, then change the width and height under the pixel dimensions the percent you think will work. I usually start with about 80 percent. If it is still too big, you can repeat the steps, adjusting the percent if needed. If it is too small you can undo by going to edit undo, and adjust the percent as needed.
The second way to resize something is to grab your pick tool, the little arrow, click on the layer you wish to resize and as long as you have clicked the pick tool, you should see a type of box around the layer or element or whatever you are resizing.
Grab the box by a corning and drag it to the size you want. Keep in mind that most artisits do not allow you to make the tubes bigger, and
be sure to check the tou for scraps as well.
New Image-600x600 transparent
Copy and paste element 4, it kinda looks like a window, as a new layer. This will be our frame. I did not resize mine but u can resize yours if needed.
Copy and paste a paper of choice, I used paper 10. Resize twice by about 75 percent. Adjust the size if needed using the pick tool.
Put this layer under the frame layer.
Open element 70. Resize by about 75 percent, then use the pick tool to adjust so it fits nicely across the bottom of the frame. See my tag for reference.
Paste one of the candles as a new layer, I used number 13. Resize with the pick tool and place at one of the bottom corners of the frame. Duplicate this layer
by going image duplicate, and then go image mirror. You should now have one on each side of the frame.
Paste element 27, the red and black corset thing, as a new layer, resize as needed and move this layer below the frame but above the paper. Position to one side so it
shows through the frame.
Paste element 9, looks kinda like a garter, as a new layer and resize as needed to make it toward the bottom of the corset. See my tag for reference.
Click on the corset layer and go layers merge down. Your corset and your garter should now be one layer. Duplicate this layer and go image mirror. Place
into position so it shows through the other side of the frame.
Open one of the stemmed roses, i used number 50. I had to rotate mine by going image free rotate, 90 degrees left. Resize as needed and postion on one side of your frame.
Move this layer to just above the frame layer. Once happy with placement, go duplicate and mirror. Postion if needed on the other side of the frame.
Open a pair of the wings, I used number 14. Paste as a new layer and resize. Move to the left of the frame and drag this layer under the paper layer. See my tag for how it should look. Once happy with it, duplicate and mirror. Put into position if needed. Merge these two layers together like we did before. Duplicate this merged layer and go image flip. Move this layer up closer toward the first set of wings. Again see my tag for how this should look.
For each of the wing layers, I went to effects, edge effects, enhance.
Paste your tube as a new layer and position just above the frame layer. I resized mine a little and put it in the center of the frame.
Give your tube and each of your element layers a drop shadow of choice by going effects-3d effects-drop shadow. Play around till you find one you like.
I also decided to place the black feather on my tag. I resized it and placed one each side of the frame at the bottom, then i merged them together and duplicated
that layer, then flipped it and moved the flipped layer under the frame layer.
Now is the time to resize your entire tag if you wish to do. You do this by going image resize, make sure all layers is checked and lock aspect ratio is checked, change the percent to pixels and choose your size.
Once happy with the size of your tag, add the copyright so it is clearly visible. Add your name in a font of choice.
Give it a drop shadow. Save and you are done!
©angel flower January 2011
 Click the tag to see it full size
This Tutorial was written by me, Angel Flower, from my own ideas. Any similarities to others is coincedence. All my tutorialsare registered with TWI.
For this tutorial you will need A tube of choice.I am using the work of Jose Cano.
In order to use the image in this tutorial you MUST purchase it from MPT.
Scrap kit- I am using an awesome kit called Pink Chocolate Sweets by Miss Foxys Designs, you must purchase this kit from The Creativity Box. You can visit her site here http://missfoxysdesigns.blogspot.com/
A Note: Anytime you need to resize something,such as an element or paper, you may do it one of two ways. The first method is by going to image-resize. Under pixel dimensions, make sure the drop box says percent,Lock aspect ratio should be checked and all layers unchecked, then change the width and height under the pixel dimensionsthe percent you think will work. I usually start with about 80 percent. If it is still too big, you can repeat the steps, adjusting the percent if needed. If it is too small you can undo by going to edit undo, and adjust the percent as needed.The second way to resize something is to grab your pick tool, the little arrow, click on the layer you wish to resize and as long as you have clicked the pick tool, you should see a type of box around the layer or element or whatever you are resizing.Grab the box by a corning and drag it to the size you want. Keep in mind that most artisits do not allow you to make the tubes bigger, andbe sure to check the tou for scraps as well.
New Image-600x600-transparent.
Open paper 13 and paste as a new layer. You will need to resize this. I resized mine by 65 percent.
Grab your magic wand, mode is add, match mode rgb, tolerance 20, anti alias checked, outside. Click in the center of the paper.You should now the the little dancing ants around the plain paper only. Go to selections invert,then go selections-promote selection to layer. Selections-select none. Now you should have another layer with the folded paper on it alone.
open one of the heart print frames, I used number 2, and paste as a new layer. Resize about like mine,about 60 percent, and go image mirror. Position on the top right corner of the paper. See my tag for reference.
Paste the rose2 as a new layer. Resize it about like mine and place at the top of the frame so it slightly covers the edge of the folded paper.See my tag if needed. Duplicate this twice and place the in a row as i have mine. If you made your roses smaller than mine, you will need to duplicate your roses a few more times so they fit like mine.
On each rose layer, I chose to sharpen them. Click on your first rose, go to adjust, sharpness, sharpen. Do this to the remaining roses.
Now paste the rose again, this time make it smaller than the last ones, postion along the heart frame on the left side of it so the firstsmall rose touches the edge of the bigger one. If needed see my tag for placement. Duplicate the rose as needed and postion following the edge of the left side of the frame. I used the same sharpen tool for each of these. I also gave each of these smaller roses a drop shadow.Go to effects, 3d effects, drop shadow, 0,0,75,4,black.
Open one of the flowers, I used flower 1. Paste as a new layer and resize. These should be about the size of the small roses.I duplicated mine so I had a total of five. Position them along the right side of the heart frame up to the edge of the paper.The first one should be just under the small rose at the tip of the heart. See my tag if needed. Again i repeated the sharpen and thedrop shadow.
Paste the flower again, this time leaving it a little bigger. I used five of these also. Position the first one under the small flower layersat the right edge of the paper. Position however many you need in a straight row down until you get to the folded paper part. See my tag if needed.and once more apply the sharpen and drop shadow to each one.
Open the cherry blossom 2. Paste as a new layer. Go image mirror. Resize and place to the right of the tag on top of the bigger flowers. Place how you likeor see my tag. Give it a drop shadow of choice.
Now i chose to paste one of the doodles so the paper back wouldnt look so plain. This is up to you. I used flowers and hearts 1. Paste it as a new layer.Resize and postion toward the bottom right of the tag. Move this layer so it is above the pink paper but below the folded part. I then duplicated this layerand went image, flip. I positioned it over the left of the tag.
Open the main tube you are going to use and paste it as a new layer. Put it into positon like mine, or where you like, If you need to resize it do so, or if you just have parts sticking out of the bottom or the side, You can grab the eraser tooland carefully erase them just enough so it doent stick out. The other way you can fix it is to grab the magic wand and change it to the selection too by clicking the little drop arrow next to it. Choose selection, type is rectangle, mode is add, feather 0, anti alias checked.Draw a rectangle around ONLY the parts you want to delete. Hit delete on your key board. Selections, select none.
Give your tube a drop shadow of choice.
Now open the tube you want inside the heart. Paste as a new layer and postion the part you want to show inside the frame.Resize to how you need it. Grab the magic wand tool, same settings as before, and click in the center of the frame. Selections,modify, expand by about 3. keep selected and click on your tube layer, selections invert, delete.
Double click this layer and change the opacity to 50.
Give the heart frame a drop shadow.
If you wish to resize your entire tag, now is the time to do it. To do the entire tag, use the image resize method, this time changing the percent to pixels and choosing the size, and make sure all layers is checked.
Once happy with it, add your copyright so it is clearly visible.
Add your name in a font of choice. I then went to layers, convert to raster, then adjust add noise,random, monochrome and 10 percent.Give it a drop shadow, i used 0,0,100,7,black.
Save and your are done.
©angel flower January 2011
 This Tutorial was written by me, Angel Flower, from my own ideas. Any similarities to others is coincedence. All my tutorials are registered with TWI.
For this tutorial you will need
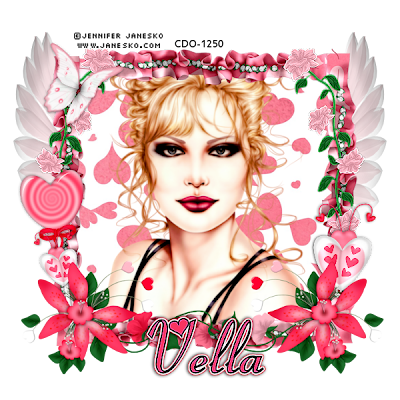
A tube of choice.I am using the work of Jennifer Janesko. In order to use the image in this tutorial you MUST purchase it from CDO.
Scrap kit- I am using an awesome kit called Kupid Kitty by Wench Designs, you must purchase this kit from The Creativity Box.
Filters-eyecandy 4000-this is optional
New Image-600x600-transparent.
Open one of the ruffles, I used ruffle3. Paste as a new layer and resize it if needed. Anytime you need to resize, you can go image-resize-choose percent instead of pixels, make sure all layers is unchecked, and start with 80. If it is too big you can resize again, if its too small, simply go edit, undo, and then do the resize again with a smaller percent. You can also resize by grabbing the pick tool, the little arrow, and grabbing one of the corners of the box and dragging it to the size you want. Once you have resized your ruffle, postion near the top of your tag. Duplicate it by going image-duplicate.
Now go image flip, and then image mirror. Leave it where it is for now. Duplicate it again, and this time go image-free rotate-all layers unchecked, rotate single layer around center checked, 90 degrees left.
Postion this to the left of your tag. Now duplicate this one and go image mirror, and then image flip. Now that we have four pieces postion them to form kind of a rectangle as I have mine. This will be our frame. Once all positioned, go to layers-merge visible.
Now if you wish to resize the frame we made, do that now to how you want it.
Copy and paste flower6,or a flower of choice, as a new layer. Resize it and postion at the bottom left corner of the frame. Duplicate it and go image mirror. If needed move into position on on the opposite corner of the frame.
Paste flower vine1 as a new layer and move this layer below the two flower layers we just pasted. Resize the flower vine and position it on the bottom part of the frame in between the two flowers on the corners. See my tag for placement.
Copy and paste a paper of choice as a new layer. Move this below your frame layer. I chose to resize mine by about 64 percent using the image resize
method, then I used the pick tool and adjusted the size by dragging a corner of the box so that it fit in the frame. You can do as I did or you can grab
the magic wand, click in the center of the frame, go selections modify-expand by about 3, then invert and on your paper layer hit delete.
Paste lollipop1 as a new layer. Resize it and position on the left side of the frame. Move this layer under the flower layers. I also rotated mine
slightly using the pick tool.
Open the lovebug2 and paste as a new layer on your tag. Resize to your liking and position on the right side of your frame. See my tag for reference how this
should all be looking. Duplicate the bug and resize the duplicate and place over your lollipop stick. Again see my tag for how it should look.
Give the two bugs a drop shadow. Effects,3d effects, drop shadow, on the litte one I used 0,1,70,5,black, and on the bigger one I used 0,-1,70,5,black.
Paste the rose vine3 as a new layer. Resize and position on the right side of the frame. Move this layer to just above the frame layer. I went to effects-edge effects-
enhance. Duplicate this layer and go image mirror. Place into position if necessary. See my tag if needed for how this should look.
I then chose to place a butterfly on the left side of my frame toward the top.
Paste your tube and resize as needed. If any part sticks out of the frame, use the magic wand and click in the center of the frame, then go selections invert, and on the tube layer hit delete.
I chose to use the filters xero porcelain and radiance on mine. This is optional. For the xero-porcelain effect I used 50,128,128,0,0,0. Then I applied xero radiance using 128,128,128,88.
Give your tube a shadow of choice, I used 0,0,50,7.
Paste wings1 as a new layer and move this to the very bottom of your layers. Move it to the left and toward the top of the frame so it sticks out from the side and just above the top. Resize slightly if needed. See my tag for rerference. Grab your eraser tool and erase the little part that sticks out further toward the middle top of the frame. Now duplicate this layer and go image mirror.
If needed slightyly reposition. On both wing layers I used the edge effects enhance.
Now is the time if you wish to resize your entire tag to do so by going image resize, choose pixels instead of percent, make sure all layers is checked and choose the size you want.
Add your copyright so it is clearly visible. Add your name. I added a gradient glow to mine using eye candy 4000 but this is optional. I used a glow width of 3 with two colors. I then added a drop shadow to it.
SAVE AND YOU ARE DONE!
©ANGEL FLOWER JANUARY 2011

This Tutorial was written by me, Angel Flower, from my own
ideas. Any similarities to others is coincedence. All my tutorials
are registered with TWI.
For this tutorial you will need
A tube of choice.I am using the work of Keith Garvey. In order to use the image in this tutorial you MUST purchase it from MPT.
Scrap kit- I am using an awesome kit called Kupid Kitty by Wench Designs, you must purchase this kit from The Creativity Box here.
Filters-eyecandy 4000-this is optional
New Image-600x600-transparent.
Choose a frame, I used Frame7, copy and paste as a new layer. Resize by going image-resize-choose percent instead of pixels and change the number to 80. If this is still too big for you, you can resize again or you can click the pick tool in your psp, usually the little arrow, and drag the box you see by the corner to the
size you want.
Grab your magic wand tool, mode is add, match mode is RGB, tolerance 20, anti alias checked. Click inside the empty space/spaces of your frame. Go to selections, modify, expand by 2. Paste a paper of choice as a new layer, I used paper 21. Keep selected and go selections invert, then hit delete on your keyboard. This should remove any paper outside of the frame. Selections, select none.
Move your paper layer below your frame layer.
Click your frame layer to make it active. Effects, 3d effects, drop shadow. Use one of your choosing or I used 0,0,100,5 and black for color.
Paste a rose, I used rose 8, as a new layer. Resize it either by the image resize method or by using the pick tool and dragging the box to about the size of mine, or how u like it. Once you have it sized, grab your pick tool. Rotate the rose, you can do this with the pick tool by hovering over the small little rectangle that comes out of the center of the box, you will see two arrows if you hover over it. Click and hold it and move your mouse either up or down depending on which way you want it to go. Rotate it about like mine, or how you like, and then move it over to
the frame as I have mine.
Once you have it positioned, duplicate it and move the duplicate under your frame and paper layers. Go back to the top copy of the rose and grab your eraser tool. I used round shape with a size of 55, hardness 100, step 1, density 100, thickness 100, rotation 0, opacity 100. Erase the parts of the rose stem that are on top of the frame. I left mine so it looks as though its popping out from the side. You want to make it look like it is come out from under some part of the frame. Once you are happy with that, repeat the process but on the opposite side of the frame as i did mine.
Open one of the cats, I used cat10, and paste it as a new layer. Resize to your liking and position to the to the right side of the frame. See my tag for placement.
I then pasted one of the mice, mouse 6, as a new layer. Resize and Position this to the left and kind toward the top of the frame. Again see my tag for placement.
Paste your tube as a new layer. If needed resize it, move it below the frame but above the paper. Grab your magic wand, same settings as before, click on your frame layer and click inside the frame as before,selections, modify, expand by about 5, go back to your tube layer and go selections invert, hit delete. This should get rid of any part of the tube that was sticking out of the frame.
select none.
If you have another frame like I do, repeat the above steps for pasting the tube, the only two things I did differently was I went image, mirror, so the tube was facing the opposite way, then after it was all postioned and such, I changed the blend by double clicking it in the layer palette and changing the blend to hard light.
If you chose a double frame like I did, Choose another flower and paste it as a new layer above your frame layer. Resize and postion toward the top of the smaller of the two frames to the left side. If needed, rotate it some to make it fit how you want. I placed these all around my frame by pasting and resizing and rotating to make them look nice.
For finishing touches, I gave the cat a drop shadow of -1,0,75,black. I gave the mouse a drop shadow of 1,0,75,black. I pasted a bow on the top right side of my bigger frame. I gave that a
drop shadow of 0,0,75,black.
Now, if you are happy with your tag and the sizing of it, add your copyright so it is clearly legible. If you wish to resize your entire tag, do so before adding the copright. Go to image, resize, this time choose pixels and put the size you wish, make sure all layers is checked, and hit ok. Now add the copyright. Add your name in a font and colors of choice.Position how you like. I used eyecandy 4000 and added a gradient glow to mine but this is up to you. Give it a drop shadow of choice, I used 0,1,70,5,black.
Save your tag and you are done!
©angel flower January 2011
