This Tutorial was written by me, Angel Flower, from my own ideas. Any similarities to others is coincedence. All my tutorialsare registered with TWI.
For this tutorial you will need
A tube of choice. I am using the work of Joan Pelaez. In order to use the image in this tutorial you MUST purchase it from CILM. www.cilm.com
Scrapkit. I am using a PTU scrapkit call Spring Garden by Foxy. You can purchase the kit here http://digitalchaos.net/store/
New Image-600x600-transparent.
New layer. Flood fill with white.
Choose one of the papers and paste as a new layer. If it is too big, resize by going to image-resize-about 85%, make sure it says percent and not pixels. Make sure all layersis unchecked.
If it is still too big you can repeat this process. If it is a little too small, then use the pick tool, the arrow, and drag it by one of the corners to the size you need to fill the background.
Paste a frame as a new layer. If needed resize using the pick tool and again drag it by one of the corners to the size you want.
Choose a paper for the inside of the frame and paste it as a new layer. If needed resize. Grab your magic wand, mode is add, match mode rgb, tolerance 20, feather 15.
Make your frame layer active and click inside the frame with the magic wand. If you dont see the little marching ants around the entire insde of the frame, click the empty space that is notselected. You may have to do this a few time in different spots. Once the inside is selected, go to your paper layer for the frame and go selections invert, and hit delete. Now you should be left with the paper inside the frame. Select none.
Move this layer below your frame layer. Make your frame layer active and give it a drop shadow of 0,0,75,10 and black.
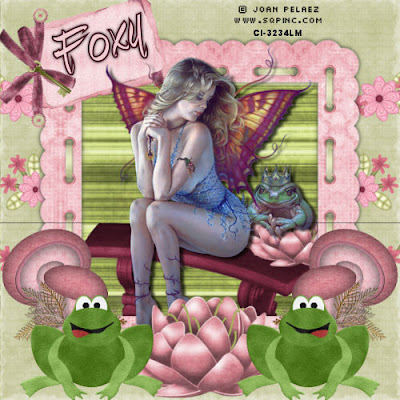
Make a new layer just above the background paper layer. Paste one of the flower vines as a new layer and postion to one side so the flowers stick out from under the frame. Try to center this on the side. See my tag for reference. Duplicate and go image mirror. Now you should have one on each side.
Paste the lily as a new layer and move this layer above the paper and frame layer. Resize if needed and place at the bottom center of the tag.
Paste the frog as a new layer and resize. Paste on one side of the lily. Duplicate it and go image mirror. Now you have one on each side.
This next part is optional depending on what kind of tube you are using. I am using a sitting tube so i pasted one of the benches as a new layer and moved it below the frame but above the paper. Resize it to your liking.
Now paste your tube as a new layer. If it is a sitting tube like mine, move it above the frame layer. Resize if needed and position so it is sitting on the bench. See my tag for reference. Now, my tube came with a frog so i pasted a couple of the lilys under the tube layer so it looks like the frog is sitting on them.
Paste one of the mushrooms as a new layer and resize. Make sure this layer is below the frog layers. Position to one side as i have mine. Duplicate and mirror.
Paste the journal tag as a new layer. Resize and bring this layer above the frame layer. Position in the top left corner.
Grab one of the buttons and paste as a new layer. Resize and duplicate. Position one at each end of the ribbon on the journal tag. See my tag for reference.
Give your tube layer a drop shadow of choice.
Now is the time if you wish to resize your entire tag to do so. Go to image resize-choose pixels, make sure lock aspect ratio and all layers are checked. Change it to the size you want. I usually use 500x500.
Add your copyright so it is clearly visible.
Add your name and position on to the journal tag we pasted. Once happy with it, give it a drop shadow of choice.
Thats it, save and your done.
©Angel Flower February 2009
No comments:
Post a Comment