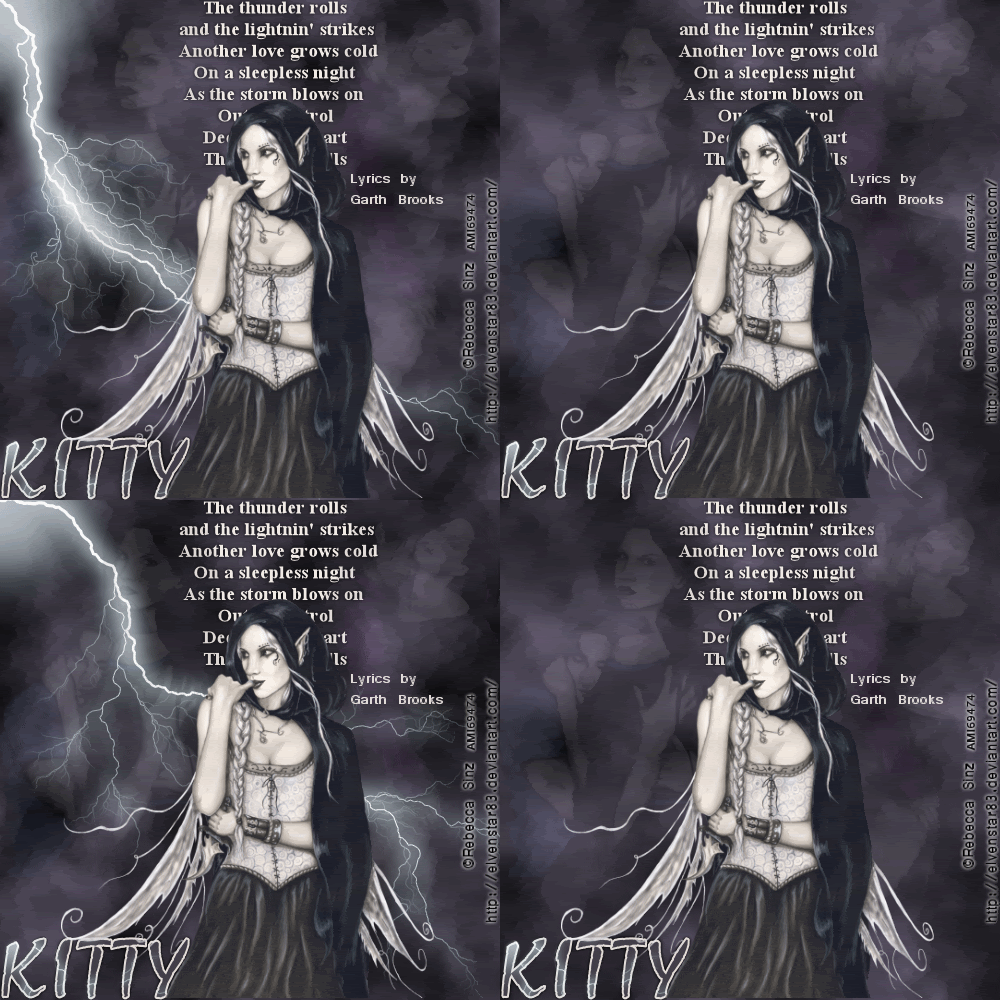
This Tutorial was written by me, Angel Flower, from my own ideas. Any similarities to others is coincedence. All my tutorialsare registered with TWI.
For this tutorial you will need
Three tubes of choice from the same artist. I am using the work of Rebecca Sinz. You must purchase a license from AMI, http://www.artisticmindsinc.com/, to use her work.
Filters- Xenofex 2 and Mura's Meister cloud
New image-500x500-transparent.
Flood fill with a gradient to match your tube. I used a linear style, foreground/background, angle of 45 and 0 repeats.
Duplicate this layer twice for a total of three.
On the top one, go Effects-plugins-mura's meister cloud-the top color is white, the middle black, and the bottom one a color from your tubes. Effect 100, amount 100, grain 3, all others are 0. Repeat on the middle one but change the amount to 115. And once more, repeat on the bottom one only change the amount to 130. Hide the bottom two layers by clicking the eye next to them.
Paste on of the tubes as a new layer. Resize if needed just a little using the pick tool, the arrow tool, and drag the box by one of the corners to the size you need. Postion in the top left sideof the tag. Right click on the layer and change the opacity to about 9. You may need to adjust this depending on your tube and colors chosen.
Paste the second tube and resize the same way. Position in the top right corner and again change the opacity to about 9, or whatever amount you used on the first tube.
Paste your main tube as a new layer. If needed resize. Position in the center of the tag. See my tag for reference.
Make your top cloud layer active and add a new layer. Go to effects, plugins, xenofex2-lightening-under the basic tab, 16,92,90,36 and click random seed once. Under the glow tab, 50,71,73, and the colors are white for inner and a very light aqua for outer.okay.
Add another new layer and repeat the lightening effect with the same settings clicking the random seed button again.
Hide the bottom lightening layer.
Make your main tube layer active and add a new layer. Move this below your tube layer. Type out the words or lyrics of your choice. I used a size of 24 for my text. Position in the top center of your tag. See my tag for reference.
If you made your tag larger then mine and wish to resize it, now is the time to do so. Go to image resize, make sure all layers is checked and choose your size.
Add your copyright so it is clearly visible.
Add your name. Convert to raster. Give it a slight drop shadow. Go selections-select all-float-defloat. Use the lightning effect we used earlier. Selections-invert-hit delete. Select none.
Now for the animation.
Make sure your top cloud layer is visible and the other two are hidden, and make sure your top lightning layer is visible, and the other two hidden. Go to edit-copy merged.
Go to animation shop and paste as new animation.
Back to psp, hide the top lightning layer, DO NOT unhide the other one yet, Hide the top cloud layer and unhide the middle cloud layer. Edit-copy merged.
In animation shop, paste after current frame.
Back in psp, hide the middle cloud layer and unhide the bottom cloud layer. Unhide the bottom lightning layer. Edit-copy merged.
In animation shop, paste after current frame.
One more time, in psp, hide the bottom cloud and lightning layers, and unhide only the middle cloud layer. Copy merged
In animation shop, paste after current frame. Go to edit-select all. Now go animation-frame properties-set to about 45. Veiw animation.
Thats it, your done!
©Angel Flower February 2009
No comments:
Post a Comment