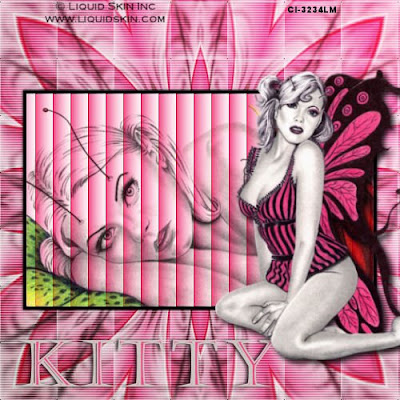
This Tutorial was written by me, Angel Flower, from my own ideas. Any similarities to others is coincedence. All my tutorialsare registered with TWI.
For this tutorial you will need Two tubes of choice. I am using the work of Manuel Quinones. In order to use the image in this tutorial you MUST purchase it from CILM.
New Image-500x500-transparent. Flood fill with white.
New raster layer. Grab your preset shape tool and set to rectangle. Make your foreground a dark color from your tube and your background a lighter color.Width of 5, create as vector and anti alias checked. Draw out a rectangle the width of the tag. See my tag for size.Position in the center of the tag. Right click this layer and convert to raster.
Make your white background layer active. Choose a gradient to match your tube, style linear, angle 45, repeats 0. Flood fill your background with the gradient.
Go to effects, texture effects-blinds- width of 3, opacity 50, color white, both boxes checked.
Still on the background layer, go to effects-texture effects-weave-gap size 1, width 70, opacity 46, weave color white, gap color black, fill gaps checked.
Back on your rectangle layer,Paste the tube you want inside the rectangle as a new layer.
Position and resize how you want inside the rectangle. Don't worry if part of it hangs out of the rectangle. When you are happy with the placement, grab your magic wand, mode add, match mode rgb, tolerance 20, feather 0, contiguous checked, click in the center of rectangle. Go to selections invert, making sure you are on the tube layer hit delete. Any bits that were hanging out should now be gone. Select none.
Again on your rectangle layer, click in the center with the magic wand, go to effects, texture effects, blinds, width of 22, opacity 70, color white, light from left/top checked.
Now go effects, edge effects, enhance.
Repeat the blinds effect.
Selections, Select none.
Hide your background layer by clicking the eye next to it. Make your tube layer active. Right click and choose merge visible. Your rectangle and tube layer should now be one. Unhide your background.
Duplicate your merged layer and on the original go to effects, reflection effects, kaleidoscope-in the image area settings are -100, -35,45,90, and in the kaleidoscope settings area they are 8,0,14, edge mode is reflect.
Double click this layer and change the blend mode to hard light and opacity to 75. Repeat the weave effect with same settings on this layer.
Now paste your main tube as a layer and resize if needed. Position to the right side of the tag. See my tag for reference.
On the tube, go to effects, 3d effects-drop shadow- i used 5,5,85,10,black.
Give your merged rectangle layer a drop shadow also, i used 0,0,85,5,and black.
Now is the time if you wish to resize your tag to do so. Go to image resize-make sure lock aspect ratio and all layers are checked, in the first drop box choose pixels, and change it to the size you want.
Now add your copyright so it is clearly visible.
Add your name. Give it a drop shadow of choice.
Save and you are done!!
©Angel Flower April 2009
No comments:
Post a Comment