This Tutorial was written by me, Angel Flower, from my own ideas. Any similarities to others is coincedence. All my tutorialsare registered with TWI.
For this tutorial you will need
A tube of choice. I am using the work of Nadia Tate. In order to use the image in this tutorial you MUST purchase it from CILM.
Filters-xenofex2 constellation(you could substitue dsb flux bright noise if you dont have the xenofex2)Eye candy 4000 gradient glow(you could substitute a white drop shadow if you dont have this)
Animation shop(optional)
New Image-500x500-transparent.
Pick two colors from your tube for your foreground and background. In your material palette, choose gradient and set it to linear, angle 145, repeats 0.Flood fill your background with the gradient.
Paste your tube as a new layer and resize it by going to image-resize-90%, lock aspect ratio checked and all layers unchecked.
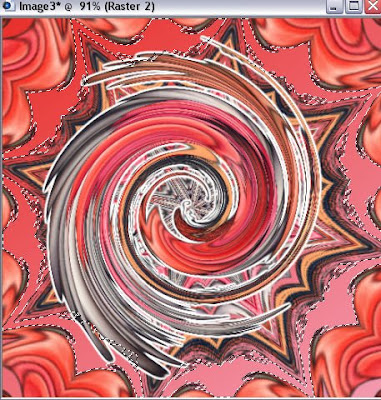
Duplicate this layer and on the original go effects-distortion effects-twirl-635. Duplicate this twirled layer and on the original go to effects-reflection effects-kaleidoscope-image area settings are 70,-64,125,55, kaleidoscope settings are 8,0,35, and wrap.
Now, on the twirled layer go to effects-plugins-eye candy 4000-gradient glow-on the basic tab-3,25,100- On the color tab-change the color to white, and choose fat from the box.If you dont have eye candy use a drop shadow with these settings, 3,3,100,2,white. Then repeat changing the 3 on both to -3.
Give your tube layer a drop shadow of 0,0,100,10,black.
Now make the layer we used kaleidoscope on active. Grab your magic wand- mode is add-match mode is rgb-tolerance 20-feather 0, contiguous and anti-alias checked, the drop box on the end is outside,click in the empty spaces between the star like shape and the outer shapes, if you look at my finished tag, you will see where i have put my constelation, these are the spaces you need to click. I have included a screenshot below without the tube layer.

Keep selected and duplicate your background layer, the one we filled with the gradient, twice for a total of three. On the top one go to xenofex2 constellation-from top to bottom settings are 1.98,50,50,42,75,75,twinkle rotation 45, keep original image, random seed click once. okay. Hide this layer by clicking the eye next to it and make the middle one active. Repeat the constellation with the same settings but click random seedonce. Hide this one and make the last one active and again repeat clicking random seed once. Selections-select none.If you dont have xenofex2, use dsb flux bright noise, intensity 85, and click lighter. Repeat on the other two layers clicking lighter once each time.
Now add your copyright so it is clearly visible. I used the same glow on mine i used on the twirl effect. Again you can use a white drop shadow instead.
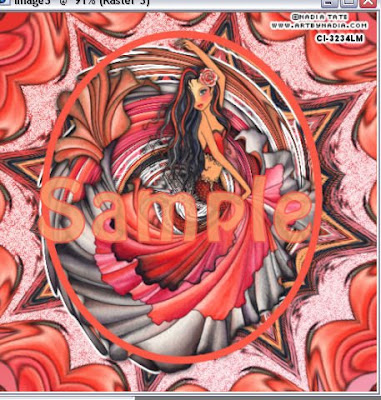
Now to add the name we need to draw out an ellipse so the right side and bottom end up about where you want your name. So click your preset shape tool and set to ellipse. Make your background null, foreground any color. Draw out an ellipse. Move this layer to the top. I have included a screen shot so you can see how i did mine. Go to image flip and if needed, reposition slightly to where you want.

Grab your text tool and make your foreground and background the colors you want for your name. Choose the font and size you want. Hold your cursor, or text tool, right over the outline of the ellipse where you want the name until you see the little A change to an A with a half circle type line under it. Click to add your text and type your name.
Now go to this layer in the layer palette and click the + sign next to it, it changes to a -, this will open up two sub layers, one with just the text, and one with just the ellipse. click the eye next to the one with just the ellipse to hide it. Nowclick the - sign, it changes back to a plus and you should now have one layer again. Right click and convert to raster.
If needed, reposition your text how you like it. Now give it a drop shadow.
Now you can save and be done or you can animate.
To animate, make sure two of the layers with the constellation(or noise) are still hid. Make the visible one active. Go to edit-copy merged. Go to animation shop and paste as new animation. Back in psp, hide the layer we just used and unhide the next one with constellation and click on it to make it active. Edit-copy merged. Back to animation shop, edit-paste after current frame. And one more time, back to psp, hide this layer and unhide the last layer with constellation and make it active. Edit-copy merged. And back to animation shop, edit, paste after current frame. View animation and save and you are done.

© Angel Flower April 2009
Noncommercial advertisement! Just for once: plain honest no nonsense spam making no pretense being something else, with a real message and an sound errand. See Window Mirror and find out.
ReplyDeletehttp://winmir.blogspot.com/See my poetry as well:
http://singleswingle.blogspot.com/I am not anyone. I am unique.
- Peter Ingestad, Sweden, I Ching Practitioner